Preparing Corel PHOTO-PAINT for your projects
Posted Nov 12, 2003
Last Updated Nov 2, 2011
When you first install Corel PHOTO-PAINT, there are a couple of reactions you’ll be prone to have. If you are new to graphic design, you might be overwhelmed with the options. If you are an experienced designer (with experience using Adobe Photoshop) you will possibly be disappointed or dismayed—there may seem like a deficiency of tools.
For many Photoshop users, the out-of-box interface of PHOTO-PAINT lacks the options of Photoshop. Their estimation is accurate on the surface, but wrong in the long-run. Anyone who takes some time to look into the features of PHOTO-PAINT soon learns that the majority of the tools available aren't visible until you've set them to be on the workspace. Since many people assume the tools are just not available, they don't take the time to learn the powerful features of PHOTO-PAINT.
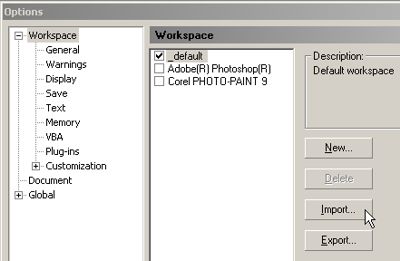
What you will learn is that PHOTO-PAINT is actually much more versatile and customizable than its competitor Photoshop. Clicking "Tools/Options" (Ctrl + J) will bring up the options menu. Under "Workspace/Customization" you will find a wide array of tools and customizable shortcuts for the program. You can export and import toolbar setups to share with co-workers. To download the workspace I use, choose Corel 12 or Corel 11. To install this workspace, click on the "Import" button under "Workspace" and browse to the file called "corel_photopaint_11_shawn.cwf" or "photopaint12_smo.xslt from cpt12.zip".
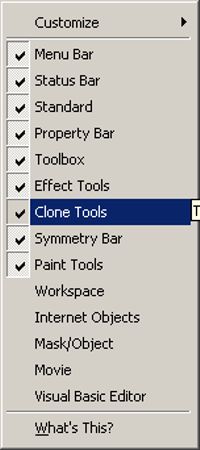
 To acquire the toolbars directly from the PHOTO-PAINT desktop, right-click on a toolbar and you will see a list of default toolbars to check. The toolbars included in the workspace above are the following: Menu Bar; Status Bar; Standard; Property Bar; Toolbox; Effect Tools; Clone Tools; Symmetry Bar; Paint Tools. Another way to select Toolbars is by clicking "Window/Toolbars".
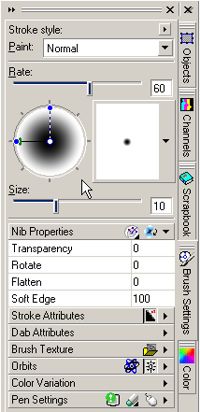
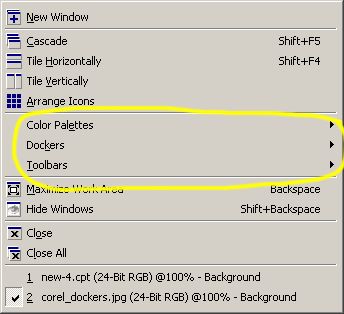
Now you'll want to expose some Docker Windows. These windows feature methods to control objects, color channels, colors and layers, among other things. The see a full list of dockers, click "Window/Dockers". The dockers most useful in my experience are Objects, Channels, Scrapbook, Brush Settings and Color. While other dockers are very useful, these are the dockers featuring tools that are useful for practically all projects.
Now that these tools are out, you'll find that Corel PHOTO-PAINT is suddenly much fuller than its out-of-box state. And you'll immediately recognize that its array of tools is up to any artistic challenge.
For many Photoshop users, the out-of-box interface of PHOTO-PAINT lacks the options of Photoshop. Their estimation is accurate on the surface, but wrong in the long-run. Anyone who takes some time to look into the features of PHOTO-PAINT soon learns that the majority of the tools available aren't visible until you've set them to be on the workspace. Since many people assume the tools are just not available, they don't take the time to learn the powerful features of PHOTO-PAINT.
What you will learn is that PHOTO-PAINT is actually much more versatile and customizable than its competitor Photoshop. Clicking "Tools/Options" (Ctrl + J) will bring up the options menu. Under "Workspace/Customization" you will find a wide array of tools and customizable shortcuts for the program. You can export and import toolbar setups to share with co-workers. To download the workspace I use, choose Corel 12 or Corel 11. To install this workspace, click on the "Import" button under "Workspace" and browse to the file called "corel_photopaint_11_shawn.cwf" or "photopaint12_smo.xslt from cpt12.zip".
Now you'll want to expose some Docker Windows. These windows feature methods to control objects, color channels, colors and layers, among other things. The see a full list of dockers, click "Window/Dockers". The dockers most useful in my experience are Objects, Channels, Scrapbook, Brush Settings and Color. While other dockers are very useful, these are the dockers featuring tools that are useful for practically all projects.
Now that these tools are out, you'll find that Corel PHOTO-PAINT is suddenly much fuller than its out-of-box state. And you'll immediately recognize that its array of tools is up to any artistic challenge.
- Using PHOTO-PAINT
Series of tutorials to help aspiring graphic designers learn to be proficient in the often-neglected environment of Corel PHOTO-PAINT.
- Introduction to Graphic Design
- Preparing Corel PHOTO-PAINT for your projects
- Tone Curve
- Unsharp Mask - Remove Blur from Digital Photos
- Using Object Layers
- Web Image Optimizer
- Related Topics