Tone Curve
Sometimes a designer gets a photo or graphic that is either too dark or too light. Several reasons could cause this, such as a photographer shooting in an evironment with little light. Fortunetely, if the photo was taken with a digital camera, there is often more detail to a photo than expected if it appears too dark.
Most reliable image editing programs come with a feature called Tone Curve. With tone curve, you can adjust color and tonal values in your image. Adjustments can be made to the image as a whole using the RGB Channels or channels in your image: Red Channel, Blue Channel and Green Channel.
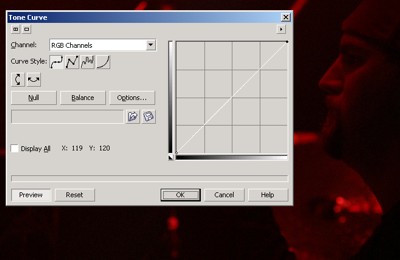
While Tone Curve can be used in both light and darken images... it is especially useful for lightening dark photos. In the examples below, the orginal photo of a drummer was exceptionally dark (A) because of a need for a fast shutter speed in a dark setting.
A
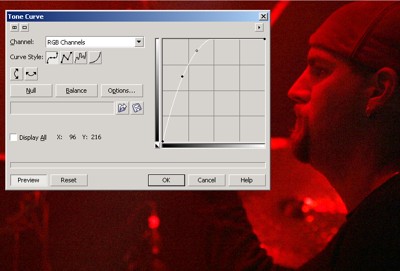
In example B, you'll see that the detail was not hopelessly lost. By increasing the Tone Curve, the detail previously hidden in darkness was brought out.
B
 Tone curve settings can be saved and used on other images with similar lighting. Access to Tone Curve in Corel PHOTO-PAINT is under "Image > Adjust > Tone Curve" or by clicking "Ctr+T".
- Using PHOTO-PAINT
Series of tutorials to help aspiring graphic designers learn to be proficient in the often-neglected environment of Corel PHOTO-PAINT.
- Related Topics